Your First Bot
Note
This article assumes the following:
- You have created a bot account and have a bot token.
- You have Visual Studio 2022 installed on your computer.
Create a Project
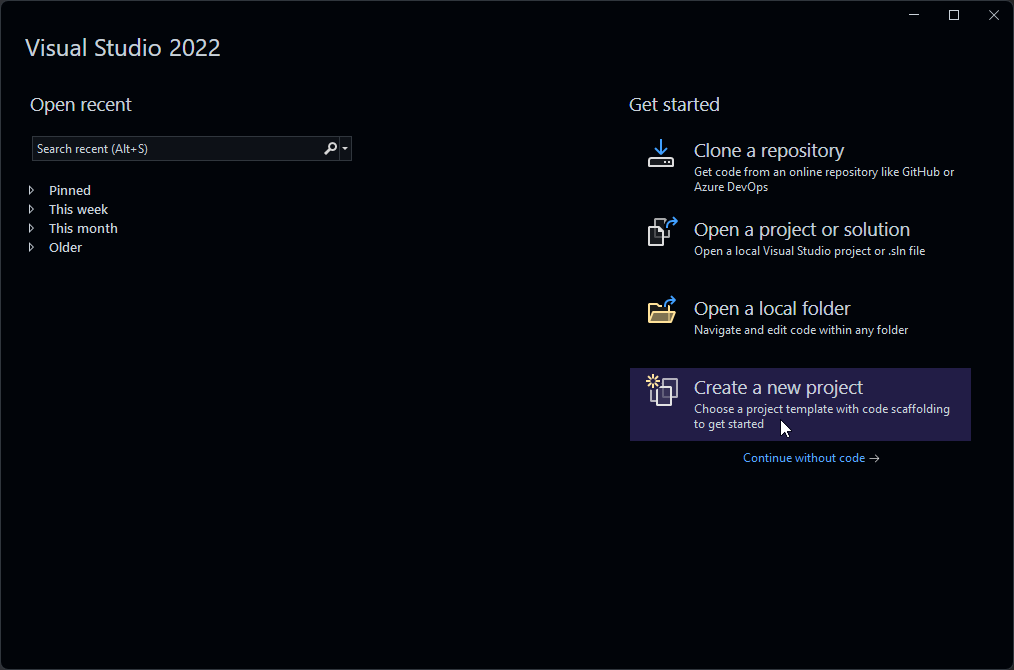
Open up Visual Studio and click on Create a new project towards the bottom right.
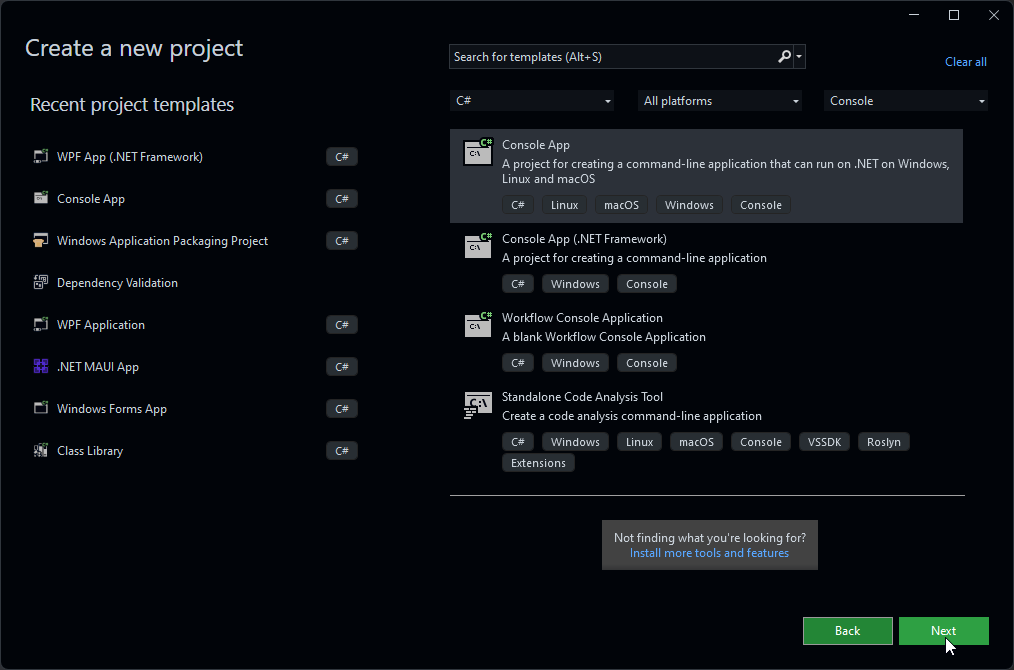
Select `Console App` then click on the `Next` button.
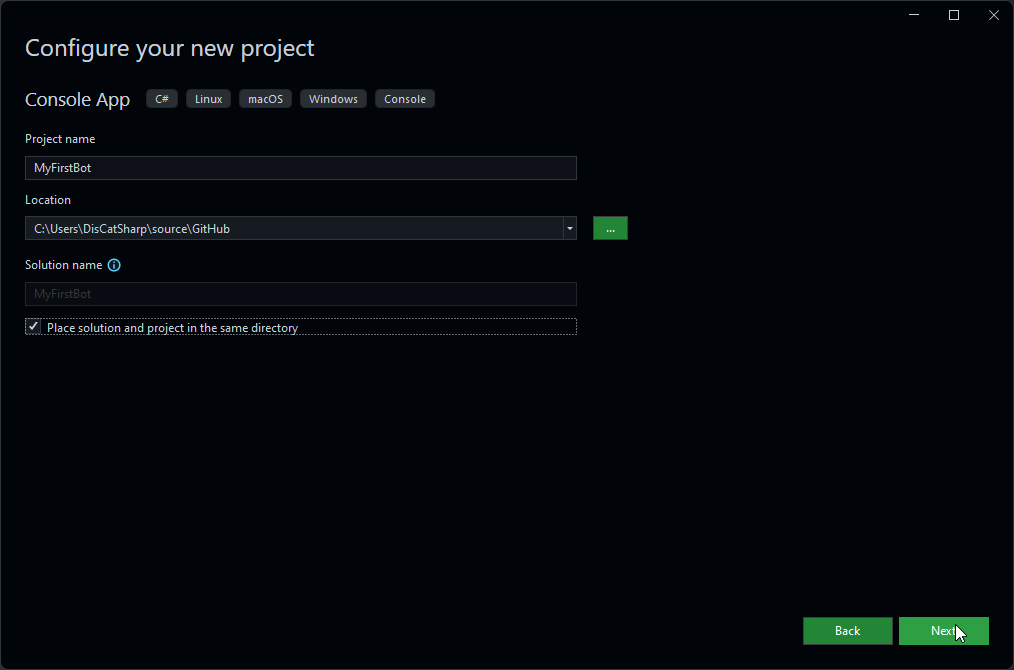
Next, you'll give your project a name. For this example, we'll name it `MyFirstBot`.
If you'd like, you can also change the directory that your project will be created in.
Enter your desired project name, then click on the Create button.
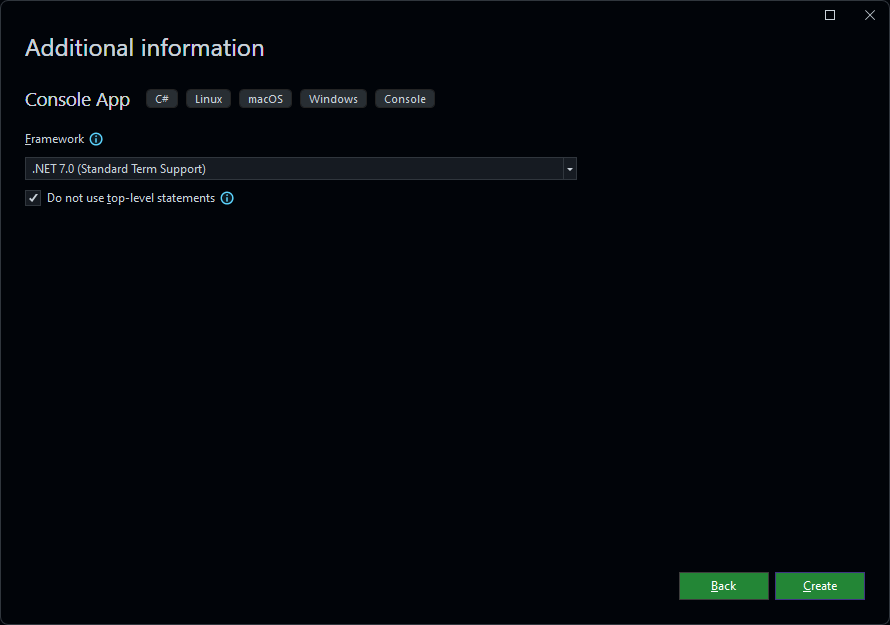
Now select `.NET 7.0` or `.NET 8.0` from the dropdown menu, tick the `Do not use top-level statements` checkbox and click on the `Next` button.
Voilà! Your project has been created! 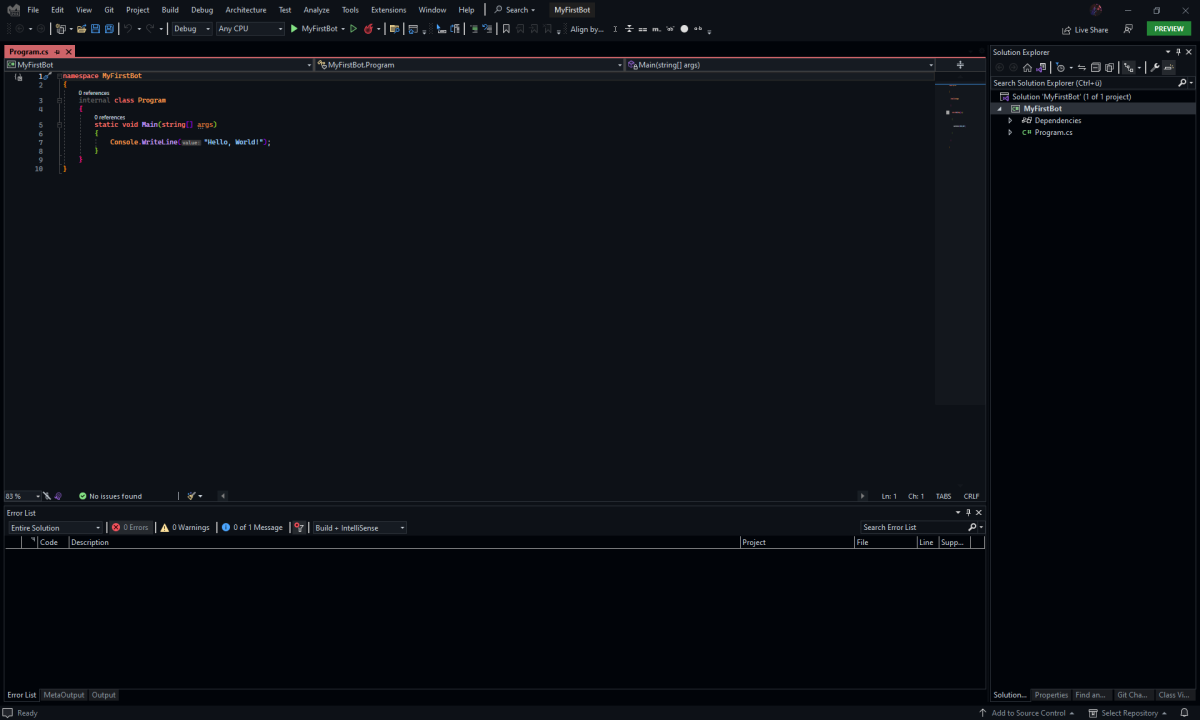
Install Package
Now that you have a project created, you'll want to get DisCatSharp installed.
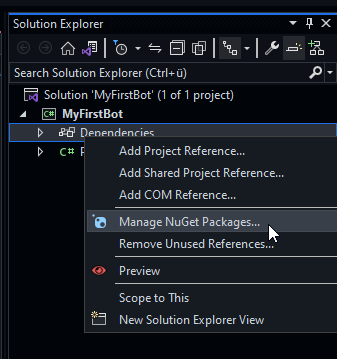
Locate the solution explorer on the right side, then right click on Dependencies and select Manage NuGet Packages from the context menu.
You'll then be greeted by the NuGet package manager.
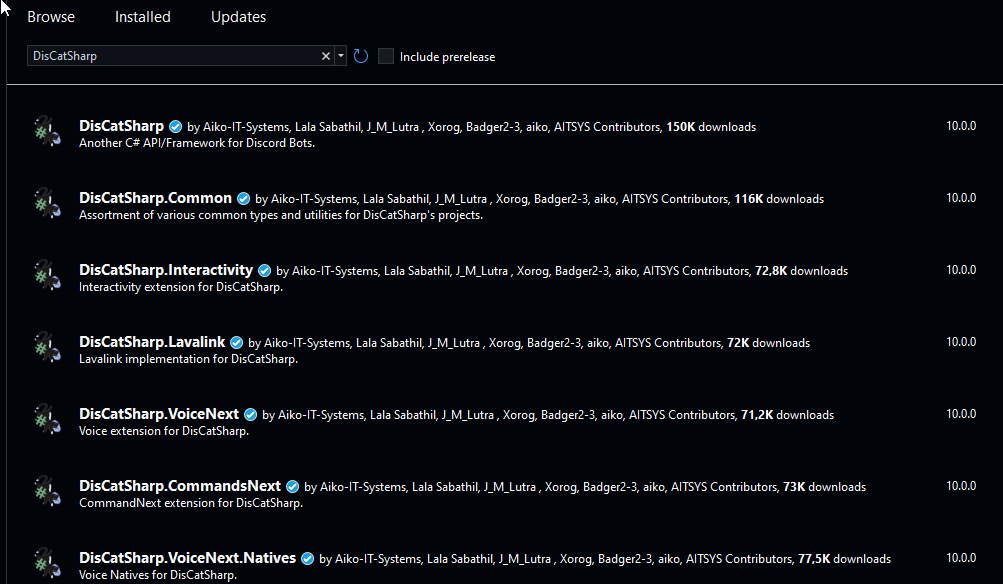
Select the Browse tab towards the top left, then type DisCatSharp into the search text box with the Pre-release checkbox checked ON.

The first results should be the DisCatSharp packages.
| Package | Description |
|---|---|
DisCatSharp |
Main package; Discord API client. |
DisCatSharp.CommandsNext |
Add-on which provides a command framework. |
DisCatSharp.Common |
Common tools & converters |
DisCatSharp.Interactivity |
Add-on which allows for interactive commands. |
DisCatSharp.Lavalink |
Client implementation for Lavalink. Useful for music bots. |
DisCatSharp.ApplicationCommands |
Add-on which makes dealing with application commands easier. |
DisCatSharp.VoiceNext |
Add-on which enables connectivity to Discord voice channels. |
DisCatSharp.VoiceNext.Natives |
Voice next natives. |
DisCatSharp.Analyzers.Roselyn |
Our custom analyzer, providing extended IntelliSense functions. As example warns you about deprecated discord features. |
We'll only need the `DisCatSharp` package for the basic bot we'll be writing in this article.
Select it from the list then click the `Install` button to the right.
You're now ready to write some code!
First Lines of Code
DisCatSharp implements Task-based Asynchronous Pattern.
Because of this, the majority of DisCatSharp methods must be executed in a method marked as async so they can be properly awaited.
Due to the way the compiler generates the underlying IL code,
marking our Main method as async has the potential to cause problems. As a result, we must pass the program execution to an async method.
Head back to your Program.cs tab and empty the Main method by deleting line 9.
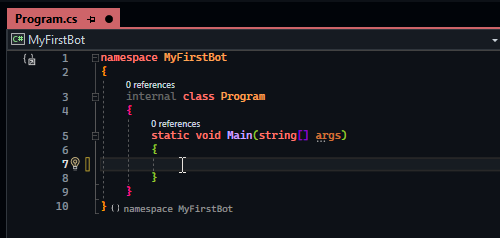
Now, create a new static method named MainAsync beneath your Main method. Have it return type Task and mark it as async.
After that, add MainAsync().GetAwaiter().GetResult(); to your Main method.
static void Main(string[] args)
{
    MainAsync().GetAwaiter().GetResult();
}

static async Task MainAsync()
{

}
If you typed this in by hand, Intellisense should have generated the required using directive for you.
However, if you copy-pasted the snippet above, VS will complain about being unable to find the Task type.
Hover over Task with your mouse and click on Show potential fixes from the tooltip.

Then apply the recommended solution.

We'll now create a new `DiscordClient` instance in our brand new asynchronous method.
Create a new variable in MainAsync and assign it a new DiscordClient instance, then pass an instance of DiscordConfiguration to its constructor.
Create an object initializer for DiscordConfiguration and populate the Token property with your bot token then set the TokenType property to TokenType.Bot.
Next add the Intents Property and Populated it with the @DisCatSharp.DiscordIntents.AllUnprivileged and DiscordIntents.MessageContent values.
The message content intent must be enabled in the developer portal as well.
These Intents
are required for certain Events to be fired. Please visit this article for more information.
var discord = new DiscordClient(new DiscordConfiguration()
{
    Token = "My First Token",
    TokenType = TokenType.Bot,
    Intents = DiscordIntents.AllUnprivileged | DiscordIntents.MessageContent
});
Warning
We hard-code the token in the above snippet to keep things simple and easy to understand.
Hard-coding your token is not a smart idea, especially if you plan on distributing your source code. Instead you should store your token in an external medium, such as a configuration file or environment variable, and read that into your program to be used with DisCatSharp.
Follow that up with await discord.ConnectAsync(); to connect and login to Discord, and await Task.Delay(-1); at the end of the method to prevent the console window from closing prematurely.
var discord = new DiscordClient();

await discord.ConnectAsync();
await Task.Delay(-1);
As before, Intellisense will have auto generated the needed using directive for you if you typed this in by hand.
If you've copied the snippet, be sure to apply the recommended suggestion to insert the required directive.
If you hit F5 on your keyboard to compile and run your program, you'll be greeted by a happy little console with a single log message from DisCatSharp. Woo hoo!

Spicing Up Your Bot
Right now our bot doesn't do a whole lot. Let's bring it to life by having it respond to a message!
Hook the MessageCreated event fired by DiscordClient with a
lambda.
Mark it as async and give it two parameters: s and e.
discord.MessageCreated += async (s, e) =>
{

};
Then, add an if statement into the body of your event lambda that will check if e.Message.Content starts with your desired trigger word and respond with
a message using e.Message.RespondAsync if it does. For this example, we'll have the bot to respond with pong! for each message that starts with ping.
discord.MessageCreated += async (s, e) =>
{
    if (e.Message.Content.ToLower().StartsWith("ping"))
		await e.Message.RespondAsync("pong!");
};
The Finished Product
Your entire program should now look like this:
using System;
using System.Threading.Tasks;
using DisCatSharp;
namespace MyFirstBot
{
    class Program
    {
        static void Main(string[] args)
        {
            MainAsync().GetAwaiter().GetResult();
        }

        static async Task MainAsync()
        {
            var discord = new DiscordClient(new DiscordConfiguration()
            {
				Token = "My First Token",
				TokenType = TokenType.Bot,
				Intents = DiscordIntents.AllUnprivileged | DiscordIntents.MessageContent
            });

            discord.MessageCreated += async (s, e) =>
            {
                if (e.Message.Content.ToLower().StartsWith("ping"))
                    await e.Message.RespondAsync("pong!");

            };

            await discord.ConnectAsync();
            await Task.Delay(-1);
        }
    }
}
Hit F5 to run your bot, then send ping in any channel your bot account has access to.
Your bot should respond with pong! for each ping you send.
Congrats, your bot now does something!
Further Reading
Now that you have a basic bot up and running, you should take a look at the following: